Good exterior lighting in Denver does more than help you find the front door. It stretches the day on a summer patio, shapes how your garden feels at night, and keeps steps safe when snow reshapes every edge. Done well, it’s invisible in the best sense, guiding and flattering without calling attention to itself. Done poorly, it glares, wastes energy, and ages fast under high-altitude sun.
After years working on colorado outdoor lighting across neighborhoods from Wash Park to Central Park, Arvada to Castle Rock, certain pitfalls come up again and again. The Front Range climate, the altitude, and even our snowpack combine to punish weak materials and sloppy design. Here are the mistakes to skip, with the practical details that separate solid denver lighting solutions from short-lived experiments.
Treating all climates the same
Fixtures that survive in coastal humidity or low-altitude suburbs can fail early here. Denver’s high UV index fades finishes and embrittles plastics. Winter brings freeze-thaw cycles that push water into gaskets and wiring. Spring winds move mulch, pine needles, and gravel that clog well lights. Pair that with summer hail, and the wrong equipment ages a decade in two seasons.
Better choices for denver outdoor fixtures usually include cast brass or copper for path and accent lights, marine-grade stainless for architectural mounts, and heavy powder coat over die-cast aluminum if weight or budget demand it. Look for thick gaskets, fully potted LED drivers, and IP65 or better for fixtures that face irrigation or snow. For buried well lights in denver landscape lighting, choose models with drain ports and gravel sumps so meltwater has somewhere to go instead of freezing around the lens.
Blasting brightness instead of sculpting light
More lumens do not equal better lighting. On fresh snow, a 200-lumen path light can read like a headlight, while a subtle 80 to 120 lumens often gives enough definition. Overlighting flattens texture and ruins night vision, which is the opposite of what you want on garden steps or flagstone.
I often start with half the manufacturer’s suggested output, then walk the site at night to adjust. In one Cherry Creek project, stepping path lights down to 1 watt each and swapping to narrower beam spread did more for clarity than any extra wattage. Your eye reads contrast and shadow. Use that.
Choosing the wrong color temperature
Our altitude makes cool whites feel even starker. Many homeowners pick 4000 K because it looks bright in a store. Outside, against red flagstone or warm stucco, it turns harsh and blue. A mix of color temperatures can work, but it needs intent.
General guidance for outdoor lighting in denver:
- Warm white, 2700 K to 3000 K, for most denver yard lighting, facades, and gathering areas. It flatters skin tones, masonry, and wood. Slightly cooler, 3000 K to 3500 K, for evergreen uplighting where you want greens to read crisp, but use a soft lens or frosted cap to avoid shine spots. Keep entrances consistent. Mismatched porch sconces, soffit cans, and path lights make an expensive home read chaotic even before you address aiming.
Ignoring beam control and glare
Glare creates the sense that a space is unsafe, even when you’ve added lots of light. It also annoys neighbors and attracts bugs. Most issues trace back to poor optics and sloppy aim.
Choose fixtures with shrouds, louvers, and adjustable knuckles. Aim spotlights past the viewer, not at eye level. On facade lighting, stop beams at the soffit instead of blowing light into the eaves, where it prints harsh scallops and rattles the moth population. For denver garden lighting on trees, aim so the beam terminates in foliage, not the next yard. Shielded step lights and recessed tread lights beat bare-bulb risers every time.
Forgetting the vertical plane
People light paths, then wonder why things still feel dim. The eye navigates by vertical contrast. Uplight a columnar juniper, wash a stone column, or tickle the underside of a pergola beam. Add a subtle sconce on a fence return to give orientation. In Highlands Ranch, a client thought she needed twice as many path lights. We lit two aspens and one section of textured fence behind the walk instead, then reduced the path lights by a third. It felt brighter and more welcoming, with less energy and hardware.
Overlooking dark sky basics and neighbor views
Front Range municipalities increasingly encourage dark sky practices. Requirements vary by jurisdiction and HOA, but most favor warm color, lower outputs, and shielding to prevent uplight and trespass. Even if your area has no formal regulation, you live with neighbors. Keep fixtures low and tight. Use full cutoffs on wall packs. Limit uplight to accent moments, not blanketing trees. If a deck overlooks city lights, turn down or amber-shift patio fixtures so your view stays the star.
Underestimating voltage drop and transformer planning
Low-voltage systems are forgiving until voltage drop bites. Long runs with small gauge wire leave the last fixtures dim and cool in color. I see many systems wired with 16-gauge daisy chains because the kit came that way. In outdoor lighting systems denver, that’s a common failure mode.
Run heavier cable, usually 12 or 10 gauge for long pulls, and home-run major branches back to the transformer in a hub layout, not a single string. Balance loads across taps if you use a multi-tap transformer. Place the transformer near the center of the lighting zones when possible. Keep splices accessible in grade boxes rather than buried randomly in mulch where every irrigation repair will slice them.
Using cheap pierce connectors and poor splices
Those quick-snap “vampire” connectors fail fast under irrigation and freeze. So do standard wire nuts without gel. Use gel-filled, UL-listed direct burial connectors, then heat-shrink for strain relief if the location is prone to movement. Where multiple fixtures tie in, a small in-grade junction box with compression fittings and a drip loop saves hours in future troubleshooting. This is the unglamorous part of landscape lighting denver, but it’s what keeps systems reliable five winters in.
Neglecting drainage for in-ground fixtures
Well lights and ground washers need somewhere for meltwater to go. Excavate a gravel sump below the canister, set the housing on compacted fines, and keep mulch back an inch or two. In Sloan’s Lake, we dug out three waterlogged well lights installed flush to turf without bedding. With a 10-inch gravel base and raised edging, the same fixtures stayed dry the next spring even with a heavy snowpack.
Placing path lights where snowblowers live
Snow reshapes your site lines and your maintenance routines. Path lights set tight to drive edges or along shovel lanes will get whacked by snow shovels or chewed by augers. In a Stapleton install, we moved four fixtures just 8 inches back and bumped the post height slightly. That was enough clearance for a two-stage blower, and the lights still read well on the path after snowfall. Think about snow storage zones too. A banked drift can bury a short bollard for weeks.
Skipping mockups and night walks
Paper plans and daytime eyeballing miss how light plays with surfaces. Even simple mockups matter. Place a couple of loaner spots with magnets or stakes, wait for dark, and walk the yard. You’ll see hot spots on siding, reflections on low-E glass, and where a single step light might do more than three path fixtures. Most smart denver lighting plans come together over two brief night visits, not just one.
Mixing incompatible metals and finishes
Galvanic corrosion sneaks up on systems that mix aluminum fixtures, brass stakes, and stainless fasteners. In damp soils or near irrigation heads, you’ll see white crust and poor conductivity within a season or two. Keep like metals with like where they touch soil and water. If you must mix, isolate with nylon washers or sleeves and use dielectric grease on threaded joins. Powder-coated aluminum can perform, but only when the coating is intact and thick.
Choosing fixtures that fight the architecture
If your house has strong horizontal lines, vertical scallops from narrow beam floods will look odd. Mid-century ranches prefer wall grazing or soffit wash that keeps sightlines wide. For Tudor or brick, gentle uplighting on pilasters and gable brackets reads more naturally than bright soffit cans. In denver exterior lighting, the best compliment is when visitors think the house looks beautiful at night without noticing the fixtures at all.
Forgetting wildlife and greenbelt edges
Along the South Platte or near open space, bright uplight can pull insects and throw light far into habitat. I keep these edges warm and low. Amber or 2200 K tape under a bench, a couple of soft tree grazes with shields, and motion at the gate when needed for security. It respects the context and avoids a nightly insect storm around your doors.
Lighting only for summer
A hydrangea that glows in July becomes bare sticks in January. Design with the dormant season in mind. Evergreen structure, boulders, walls, and trunks often carry more of the load in winter. On a Littleton project, we reconsidered a plant-centric plan after an early mockup and added a low wall wash and two trunk uplights. Come February, with snow on branches, the scene looked intentional rather than abandoned.
Ignoring reflections and glass
Bright path lights right under a living room window give you a mirror at night, not a view. Aim light away from glazing and use shielded fixtures. For patios near sliding doors, lower outputs and warmer color temperatures help keep night views intact. If you want to highlight a water feature, test angles carefully. A 10-degree shift can remove a hard reflection on the kitchen window without sacrificing sparkle.
Skipping controls and seasonal adjustments
Set-and-forget timers rarely match Denver’s long summer evenings and short winter days. Photocells help, but even better is a two-stage schedule: an earlier turn-on for ambiance, with downlights on a dimmer or separate zone that rolls off after guests head inside. Smart controls can be useful, but simple, reliable setups often win: a transformer with an astronomical clock, a zone or two on dimmers, and an accessible control cabinet.
Short, high-value controls checklist for outdoor lighting in denver:
- Use an astronomical timer so on and off follow sunrise and sunset. Separate path and step safety lights from mood zones so safety stays on later if needed. Dim or shut off uplights overnight to respect neighbors and save energy. Add a vacation mode, either smart or a randomizing plug, to vary on times when you travel. Label zones inside the transformer door so seasonal tweaks take minutes, not guesswork.
Overcomplicating the system
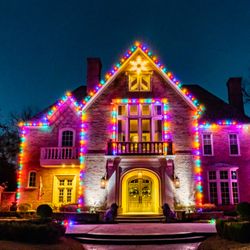
More zones, more apps, more points of failure. Complex RGB fixtures look exciting on YouTube and chaotic in a yard after two months. If you want color for holidays, put it on one or two restrained elements and keep the rest steady and warm. For most denver outdoor illumination, reliability and restraint age better than elaborate schemes.
Neglecting surge protection
Summer lightning on the Front Range is no joke. Low-voltage LED drivers and smart controls can die quietly after a nearby strike or utility surge. A surge protector on the primary side of the transformer is cheap insurance. Bond metal fixtures where required and keep connections tight and dry. I have replaced otherwise fine systems from a single surge more than once. The small add now saves a large expense later.
Forgetting about sleeves and futureproofing
Before you pour a new walk or patio, sleeve under it in two or three locations with schedule 40 conduit. Leave pull strings. Even if you don’t need those routes now, you will later. Running wire under established hardscape burdens budgets. While you’re at it, mark wire routes in a simple as-built drawing and snap a few photos with measurements from fixed points. It turns future service calls from exploratory surgery into a quick tune-up.
Putting fixtures where irrigation wins
Houzz photos rarely show sprinkler heads, but your yard has them. Place fixtures outside spray patterns when possible, or use drip in planting beds where you plan low fixtures. If heads must water across a light, pick higher IP-rated fixtures, strong gaskets, and sealed lenses. Leave space around fixture bases so mulch and clippings don’t bury them after a few mowings.
Smothering patios with downlights
Strong downlighting over a patio makes food look gray and skin look tired. Consider layered light at lower levels, like rail-integrated LEDs, a couple of discreet tree-mounted downlights with soft lenses, and table candles or rechargeable lanterns. In Sloan’s Lake, we replaced six harsh soffit cans with two warm tree downlights and under-rail tape. The grill area got task light on a separate switch. The patio felt like a room, not a stage.
Choosing fixtures that fight maintenance
Path light hats that trap pine needles look dirty a week after spring winds. Lens designs with vertical ridges collect dust and sprinkler residue. Simpler tops and slightly pitched hats shed debris better. Where cottonwoods drop fluff, avoid horizontal louvers pointing upward. Denver’s pollen periods can be rough. A system that cleans with one pass of a soft brush pays you back each season.
Overreliance on wall packs for security
Security lighting that blinds you when you open the garage does the opposite of making you safer. Use lower output, wider distribution, and shielded fixtures that light the ground plane. Add motion where it truly adds value, like gates or dark driveway corners. Combine that with gentle, always-on path lighting to keep navigation safe. Police departments routinely note that glare creates hiding spots. Balanced denver outdoor lights discourage that.
Not coordinating with trades
If the landscaper adds a boulder after you planned uplights, your wire paths may now cross sharp edges. If the electrician places the transformer where downspouts flood, you inherit a future failure. Early coordination with irrigation and hardscape teams prevents nicked wires and stranded fixtures. In one Lakewood project, a simple pre-pour meeting saved four sleeves and two rework days.
Underestimating UV and finish longevity
We talked materials, but finishes matter too. Dark bronze powder coat hides chips better than black, which shows every nick. Natural brass weathers to a soft patina that many homeowners love. Painted aluminum can chalk under Denver sun within a year outdoor lighting systems denver if the coating is thin. Ask for sample caps or stakes and leave them outside for a month. It’s the quickest truth test for denver lighting durability.
Forgetting code basics and safety
Keep GFCI protection on line-voltage feeds to transformers. Mount transformers off the ground and under eaves or in weather-rated enclosures. Keep low-voltage cable burial depth sensible, usually 6 inches or more, and cross walks in conduit where traffic or aeration occur. Many municipalities do not require permits for low-voltage landscape lighting, but code still applies. When in doubt, check with your jurisdiction or a licensed electrician. Smart systems tie into home networks that may need a weather-protected hub or bridge. Plan for that, not after the fact.
Overlooking the power bill and lamp life
Halogen still pops up in older systems and a few specialty fixtures. It has a place for rare, specific looks, but in most outdoor denver lighting upgrades, LED wins by a wide margin. LED lamps and integrated fixtures now offer high color rendering and tight beam control at a fraction of the wattage. A path light that once needed 20 watts often sings at 2 to 4 watts in LED, with 25,000 to 50,000 hour lifespans. That’s less heat on plants, less load on transformers, and lower bills.
Failing to plan service and upkeep
Even the best system benefits from a spring clean and a fall check. Snow and wind shift fixtures. Lenses fog. Plants grow into beams. Schedule a 60 to 90 minute tune-up twice a year. It’s enough to straighten hats, clean lenses, prune a few encroaching stems, and tweak aim. I keep a soft brush, microfiber cloth, dielectric grease, and a non-contact voltage tester in the kit. That simple habit keeps denver outdoor lighting reading crisp year after year.
Not using the right installation details
Little details compound into big reliability. Lay cable with a bit of slack around trunks or trellises so growth does not strangle it. Use a shallow loop at grade before entering any in-ground enclosure to create a drip path. Where you cross roots or rocks, sand bed the cable for a bit of cushion. Label transformer taps and write total wattage for each zone. When someone else services the system in three years, they will thank you.
Skipping a plan for edges and endpoints
Light should taper with intent. Ending a path lighting run at a dark void feels abrupt. Either carry a small glow forward, maybe a subtle wash on a fence panel, or allow a clear visual stop like a gate or arbor. On a Golden project, the last 20 feet of path met a native meadow. We pulled the final path light back and used a single soft wash on a boulder at the meadow edge. It signaled the transition without pretending the meadow needed lights.
Buying by brand, not by need
Brand names can help with replacement parts and warranty support, which matters in outdoor lighting installations denver. Still, lead with performance for your site, not label loyalty. Compare photometrics, beam options, serviceability, and finish warranties. Sometimes a mid-priced brass path light outperforms a premium aluminum one in Denver’s climate because it shrugs off UV and patinas gracefully. For architectural mounts, confirm the gasket design and how the backplate seals to textured stucco or stone. I keep a couple of go-to lines but always test fit and mock up.
When to hire help and what to ask
A good pro does more than install fixtures. They coordinate sleeve locations, choose beam spreads, set controls, and return at night to aim. If you bring in outdoor lighting services denver, ask to see night photos of similar projects, then ask how they built wire runs and why they chose certain optics. The answers tell you whether they design for longevity or just count fixtures. Clear proposals list fixture materials, color temperatures, beam angles, transformer specs, and installation details like connectors and junction boxes. That level of clarity translates to fewer surprises and cleaner outcomes.
Quick colorado lighting pre-hire questions that separate solid teams from the rest:
- How do you handle voltage drop on long runs and what wire gauges do you stock? What connectors do you use for direct burial splices and why? Will you return at night to aim and dim, and is that included? How do you plan for snow removal paths and irrigation conflicts? What’s your approach to dark sky and neighbor-friendly design in denver outdoor lighting?
A few Denver-specific notes that pay off
Altitude brightens everything, so step outputs down and lean warmer. Snow turns a 3000 K beam into a cooler read because of reflectance, which is another argument for 2700 to 3000 K on wide areas and patios. Spring winds will move mulch into fixtures unless you detail edges and choose lens designs that shed debris. Lightning is part of life here, so surge protection on transformers is cheap insurance. And if your home backs to a view, design patios and windows first, then work outward, so you keep the skyline free of reflections and glare.
Bringing it together with restraint
The best exterior lighting denver projects rarely need a crowd of fixtures. They need a point of view. Light the things that matter, from the front landing to that favorite grouping of aspens. Consider how winter changes the scene. Keep neighbors and habitat in mind. Build a system that respects voltage, water, sun, and snow. Then walk it at night and tune by feel. That’s how denver outdoor lighting turns from hardware into atmosphere, night after night, year after year.
Braga Outdoor Lighting
18172 E Arizona Ave UNIT B, Aurora, CO 80017
1.888.638.8937
https://bragaoutdoorlighting.com/